How to change the sleep timer on your Windows 10 computer to save power and prevent screen burn-in
- To set the sleep timer on Windows 10, you'll need to open the "Power & Sleep" menu.
- The sleep timer in Windows 10 controls how long your PC needs to sit idle before it'll go into its power-saving "Sleep" mode.
- If you're concerned with saving battery life, you should be sure to set a short sleep timer.
The sleep timer in Windows 10 controls when your PC goes into "Sleep" mode. This helps prevent screen burn-in, and keeps your computer from using more power than it needs to.
This is especially useful if you're on an unplugged laptop, and want to keep your PC alive for as long as possible.
By default, most Windows 10 computers will only go to sleep after two hours spent idle. Luckily, you can change this at any time.
How to set the sleep timer on a Windows 10 computer
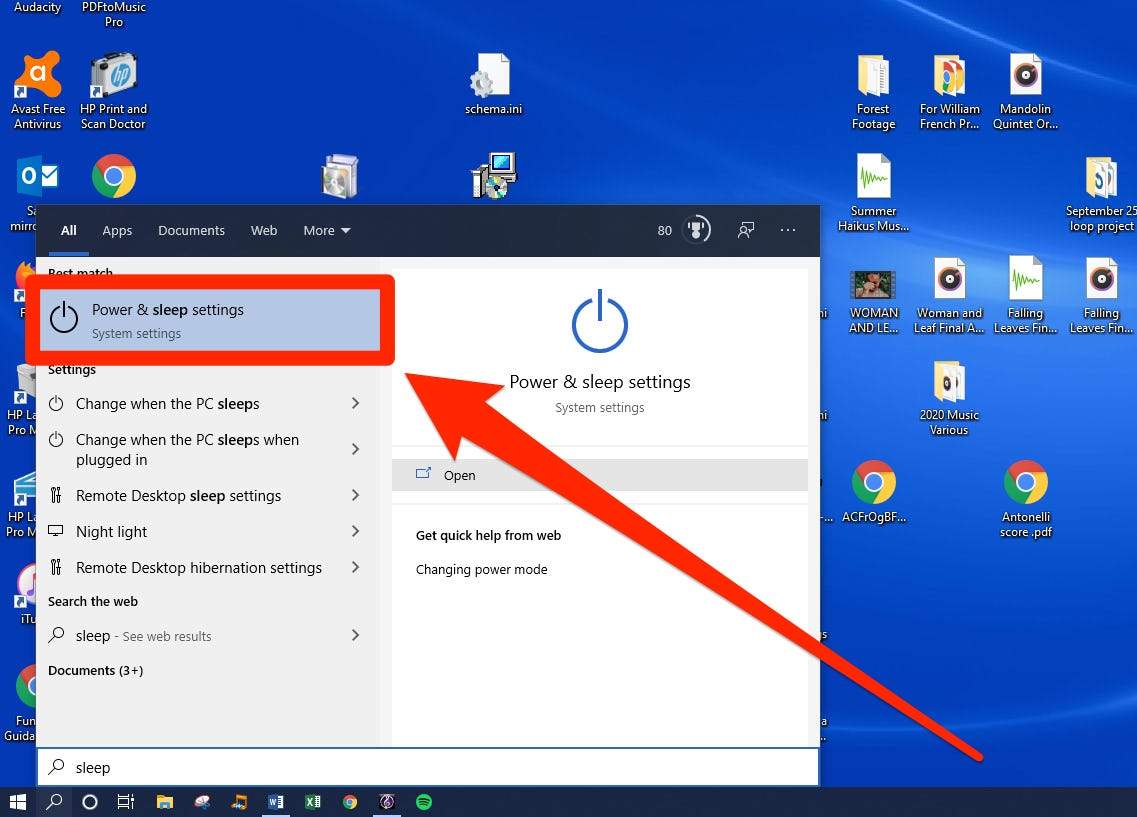
1. Press the Windows key + Q to bring up the search menu, and type "Sleep" into it.
2. When "Power & sleep settings" appears in the results, click it.
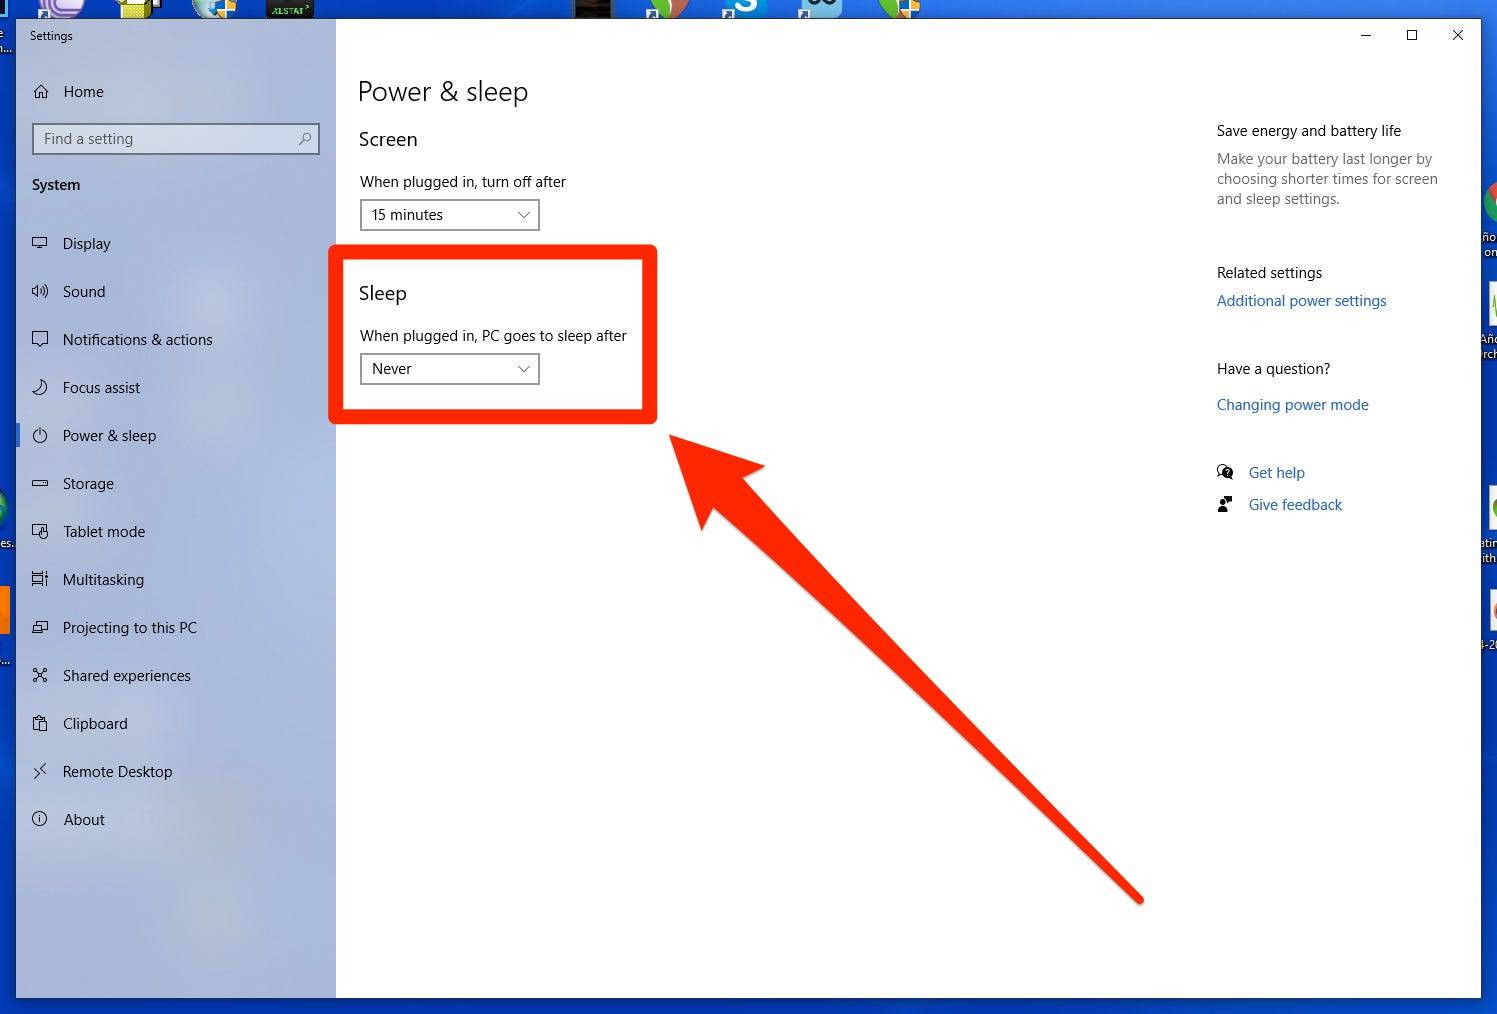
3. In the "Power & Sleep" menu that opens, scroll down to "Sleep." The drop-down menus there let you control when the PC goes to sleep. If you're on a laptop, there may be separate options for when the computer is charging and unplugged.
4. Click on the drop-down menus to open them, and select how long you want your computer to sit idle before going to sleep.
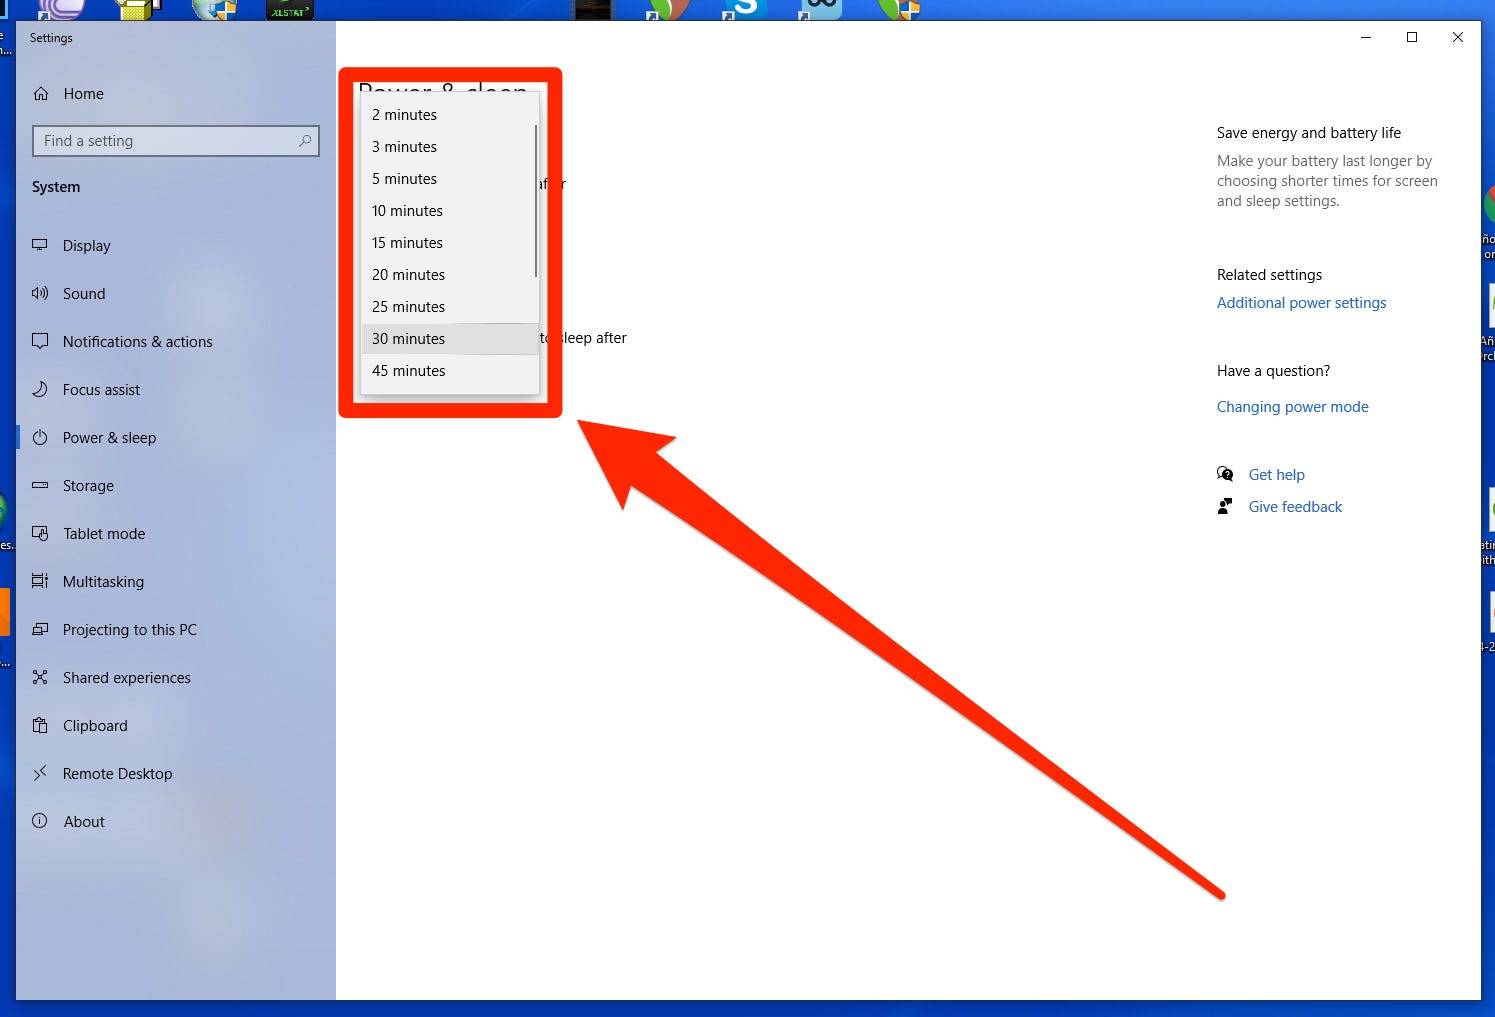
Once you close this window, your settings will be saved. You've now set your sleep timer.
Related coverage from Tech Reference:
Your Windows computer runs using 'Drivers' — here's what they are, and how to find them
How to cast your Windows desktop to a smart TV without a cable, and mirror your desktop display onto your TV
'Why won't my PC connect to Wi-Fi?': 6 ways to troubleshoot your Windows computer's internet connection
How to turn on the camera on your Windows 10 computer, or troubleshoot if it won't turn on
How to find saved Wi-Fi passwords on your Windows 10 computer in a few steps