How to create a hanging indent on a Microsoft Word document for a bibliography or works cited page
- You can create a hanging indent on Word by adjusting the format options of the document.
- Hanging indents are a paragraph formatting option where the first line is at the margin and subsequent lines are indented.
- Hanging indents are commonly used in works cited and bibliographies.
Hanging indents (also referred to as second line indents) are a formatting option where the first line of a paragraph is positioned at the margin and subsequent paragraphs are indented.
Hanging indents are commonly used in works cited and bibliographies because they make it easy for readers to see the breaks between citations and quickly scan works cited or bibliographies for author names.
Here's how to insert a hanging indent on Microsoft Word for Mac, PC, and Word on the web.
Note: These instructions work for Word for Microsoft 365, Word for the Web, Word 2019, Word 2016, and Word 2013.
How to create a hanging indent on Word for Mac
1. Highlight the paragraph(s) you want to add hanging indents to.
2. In the toolbar at the very top of your screen, click Format, and select Paragraph in the drop-down.

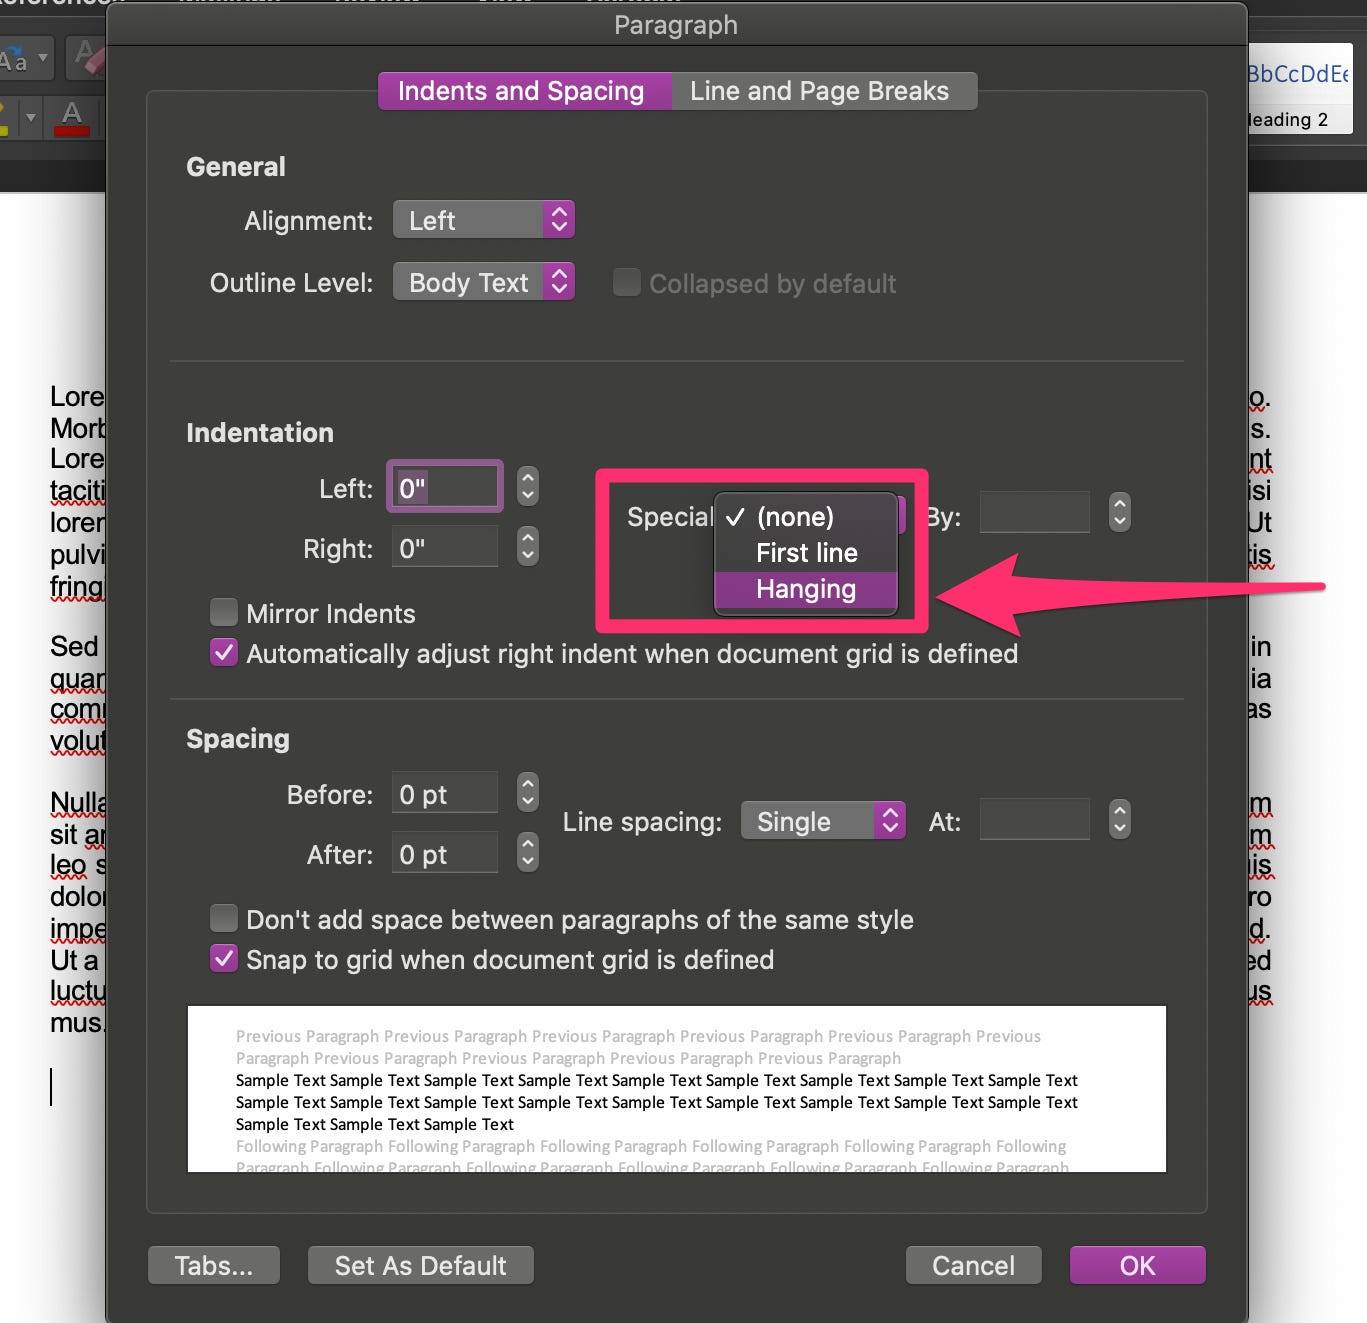
3. In the Paragraph pop-up window, go to the Indents and Spacing tab.
4. In the Indentation section, click the drop-down next to Special, and select Hanging from the list. Click the up or down arrows next to By to adjust the depth of the indent.
5. Click OK.
How to create a hanging indent on Word for PC or Word for the web
1. Highlight the paragraph(s) you want to add hanging indents to.
2. In the Word ribbon at the top of the screen, click the Home tab.
3. If you're using Word on a PC, click the arrow icon in the bottom-right corner of the Paragraph section, and in the pop-up window, go to the Indents and Spacing tab.

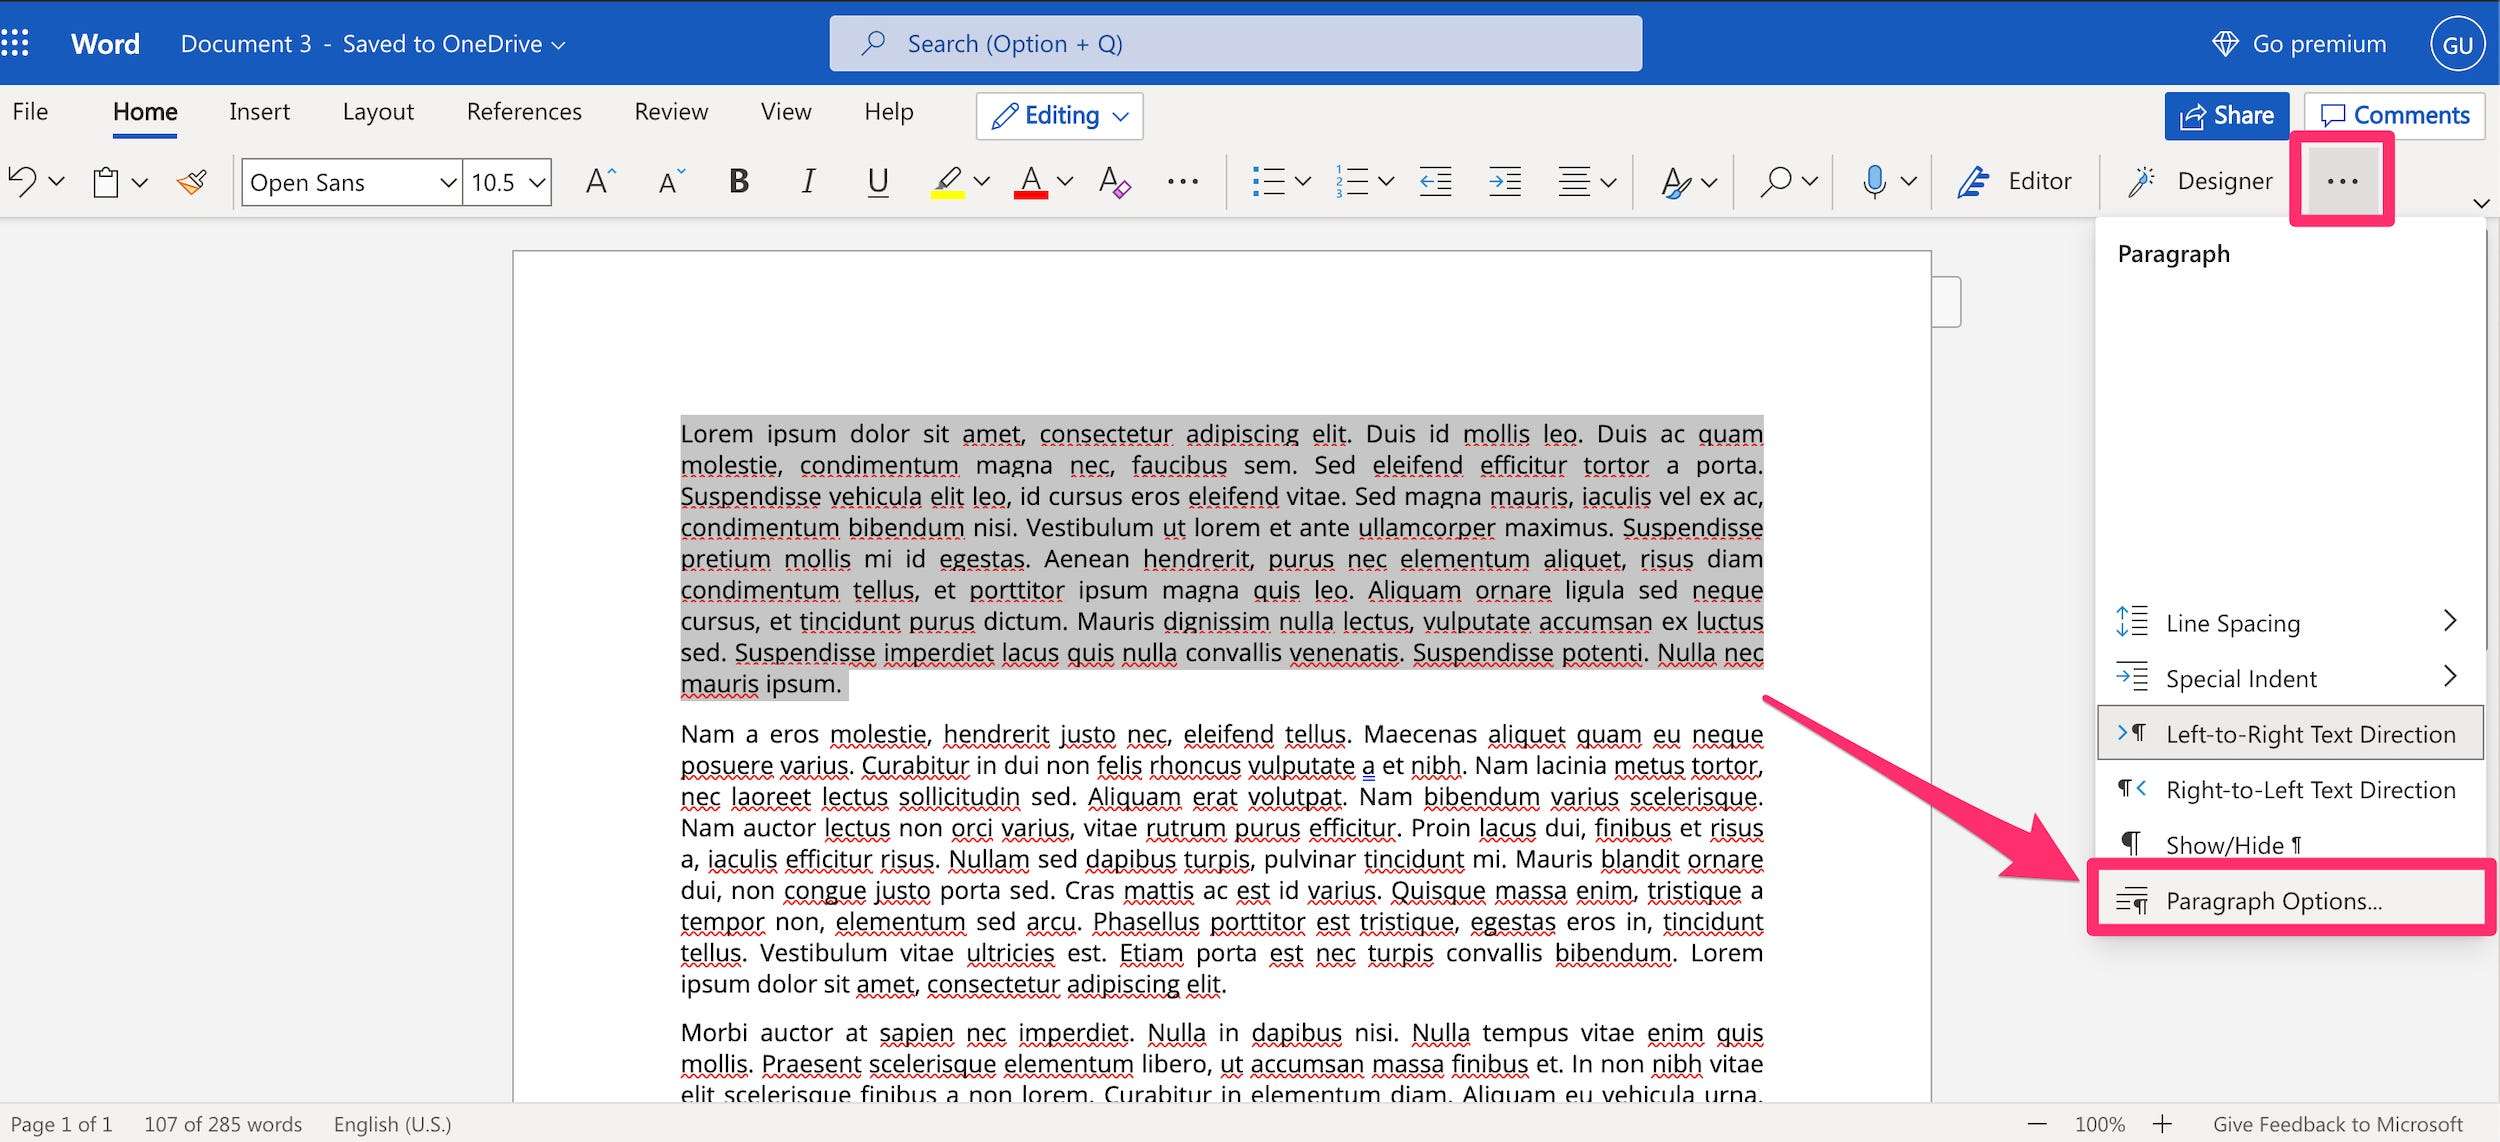
If you're using Word on the web, click the More Options icon of three horizontal dots at the far-right of the ribbon, and select Paragraph Options... in the drop-down.
5. In the Indentation section of the Paragraph pop-up window, click the drop-down next to Special, and select Hanging from the list. Click the up or down arrows next to By to adjust the depth of the indent.
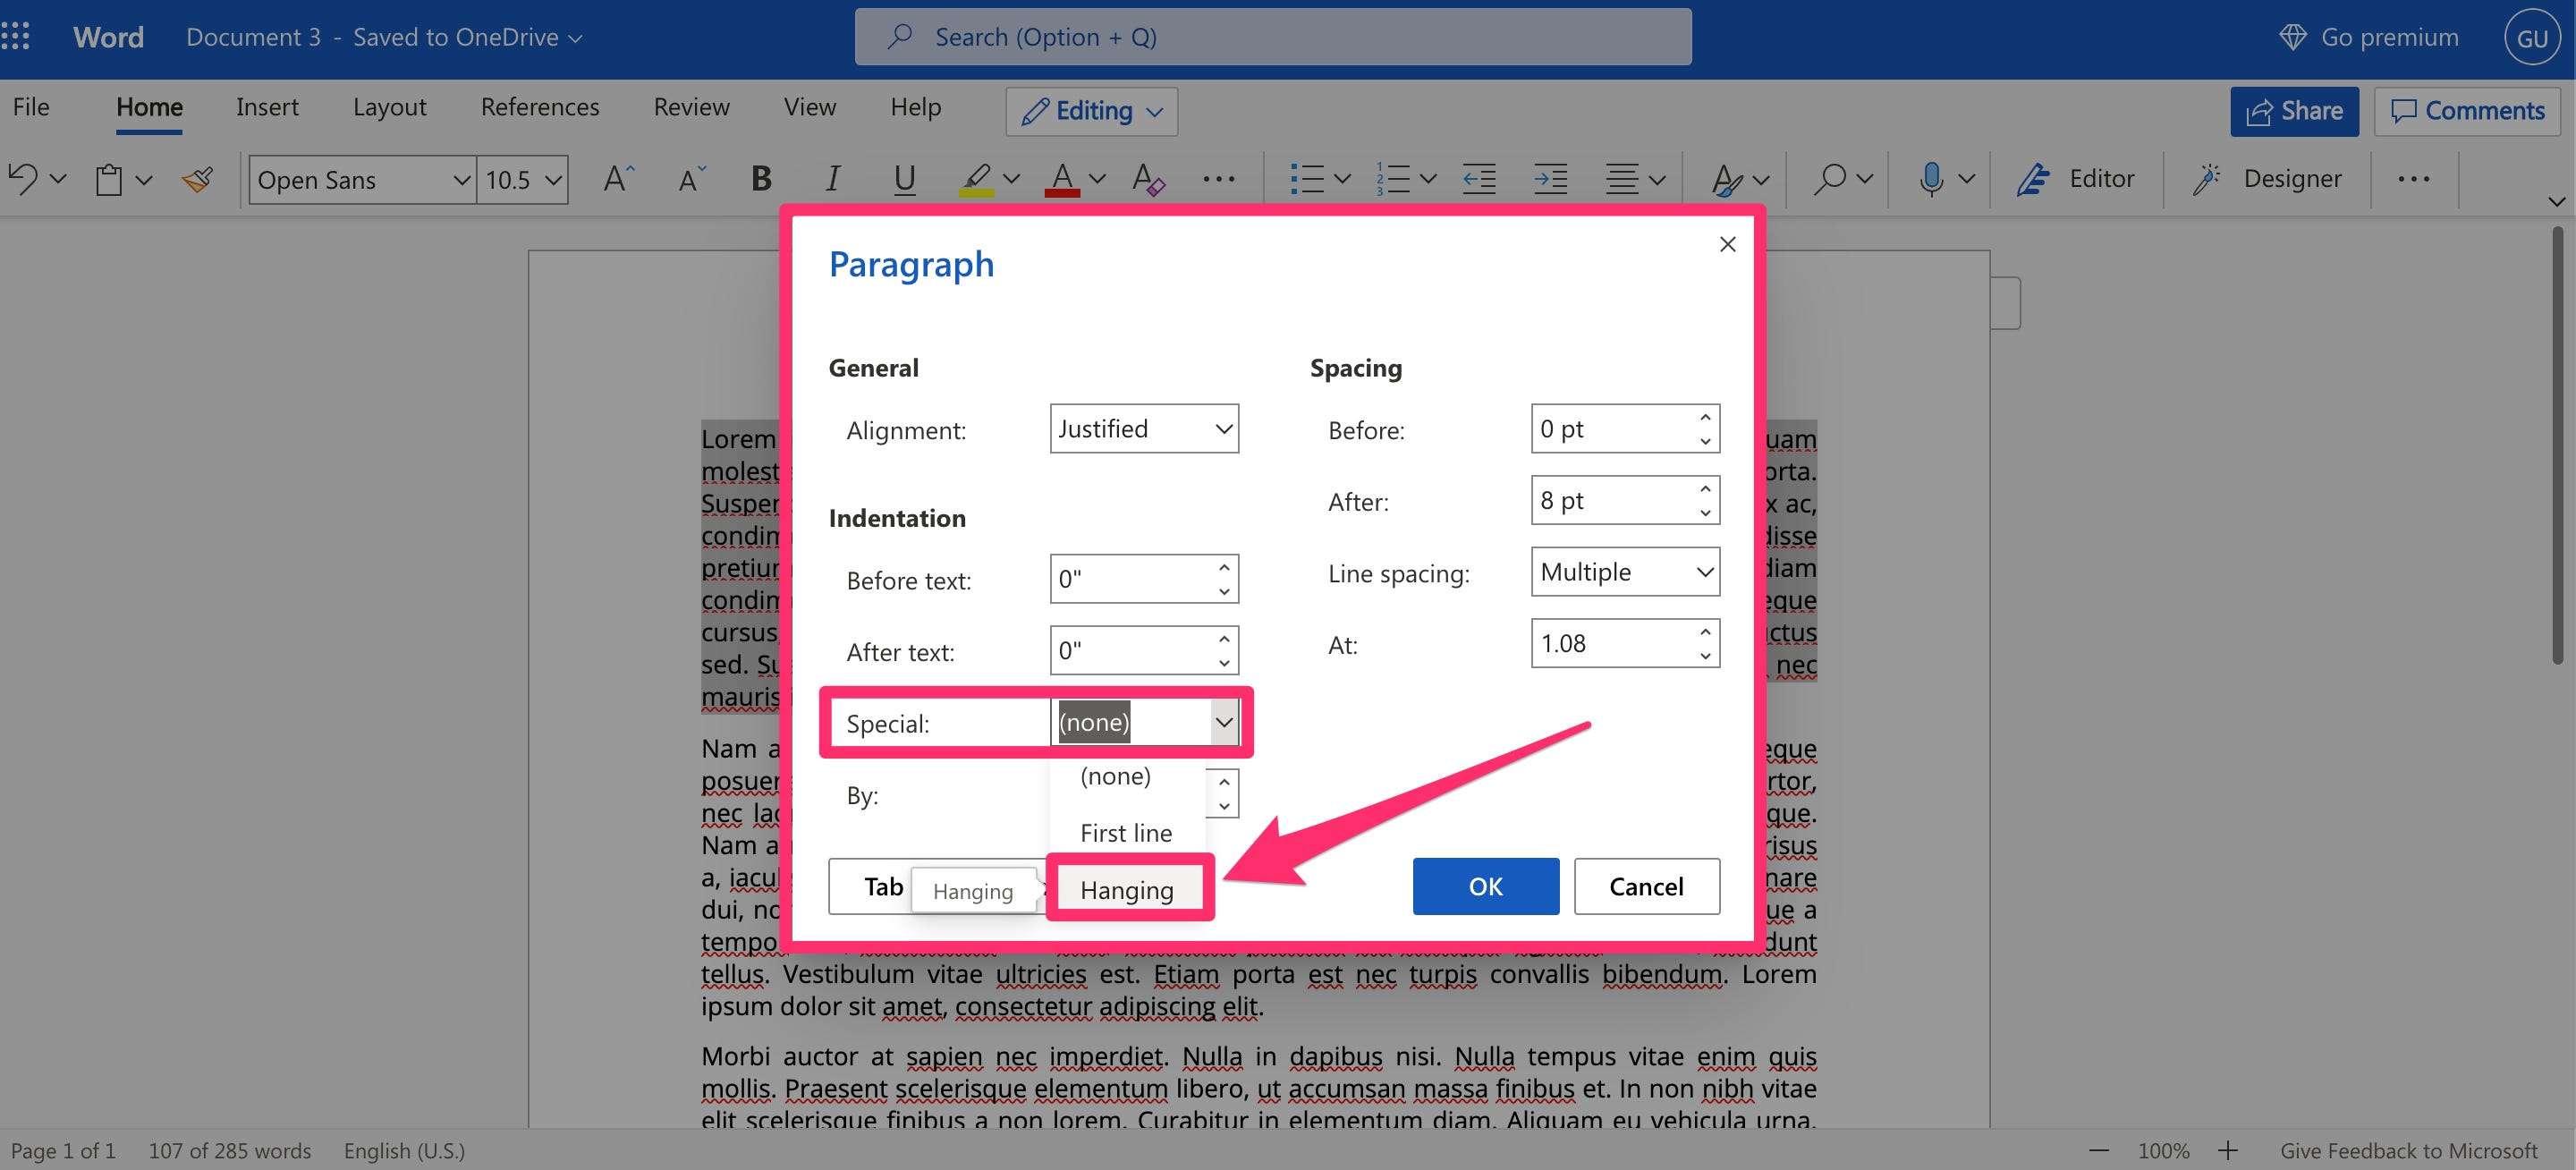
6. Click OK.